rAV1ator, a powerful AV1 encoding GUI, sees its 1.0 release.
Edit (Feb 11, 2023): This version of Aviator is now called rAV1ator & is distributed outside of Flathub. Instructions to install are below, & the page has been edited to reflect the sitation.
Edit 2 (Mar 8, 2024): rAV1ator is not to be confused with rAV1ator CLI, which is a different tool based on different underlying technologies for the command line. It does not share any "DNA" with this article's rAV1ator.
What is rAV1ator?
Manifesto
rAV1ator was designed to make
AV1 encoding accessible to the average person, but with the intention to teach
someone who is a total beginner the ins & outs of encoding AV1 videos. You can
install it by running
flatpak --user remote-add --no-gpg-verify project-volo https://giannirosato.com/repo && flatpak --user install project-volo net.natesales.rAV1ator.
I don't need to make the pitch for the open source video codec AV1 - you can
find that here - but currently I believe a
large issue barring passionate interest in AV1 is how hard it is getting
started. There are tools out there that make it easy to use the SVT-AV1 encoder
with a GUI, but I think there's a lack of other alternatives that are more
flexible and use cutting-edge technology while remaining easy to understand
(especially as it pertains to Linux where many are familiar with the command
line & don't see the need for a GUI). Enter rAV1ator.
How does it work?
rav1e + av1an
Behind the scenes, rAV1ator uses the Rust-based rav1e encoder which has seen decent increases in speed recently and is improving more every day. We decided to use rav1e in order to give users a memory-safe AV1 encoder implementation that prioritizes visual quality & 'just works' for the most part. Specifically, we are using BlueSwordM's fork which has been tuned to improve visual quality. Alongside rav1e, we are using a custom av1an fork to split videos into multiple chunks that can be encoded in parallel to increase speed & provide more options to the user. av1an also allows us to use chroma noise with our grain synthesis option which is discussed two sections down.
We've configured av1an to spawn chunks automatically, which it does based on your CPU core count & RAM quantity. Each worker is allocated one thread to account for systems that may not have multithreading. This default provides a usable balance between not aggressively hogging system resources & still performing well. That being said, AV1 encoding is heavy and will tax your system.
Video
The first screen is unassuming, with sane defaults that respect the fact that a user might not know exactly what they are messing with right out of the box. Helpful tooltips are provided upon hovering over almost anything, with detailed descriptions of each function.
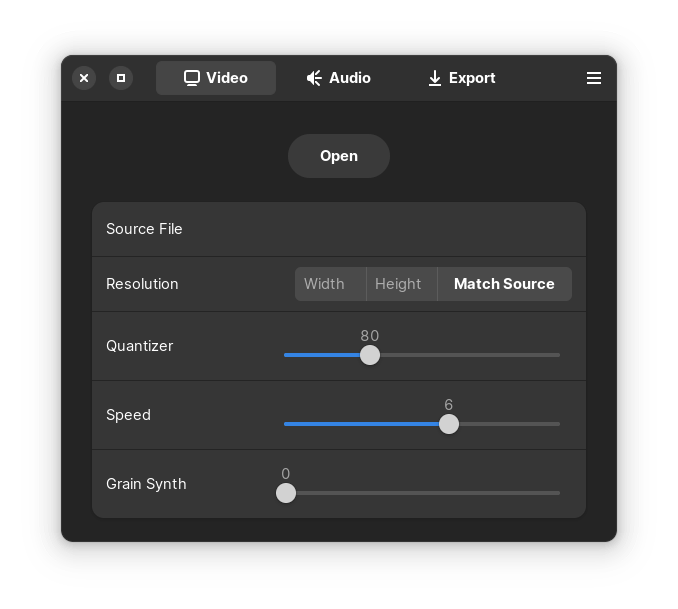
Resolution will match the video source, & otherwise defaults to 1536x864. rav1e's quantizer is set to default to 100 internally, but I believe 80 is a better option for the sake of providing better quality so that is what we use as a default. Speed 6 is a bit on the faster side for my taste, but not cripplingly slow on most systems. Grain synthesis is disabled by default, as it is not always desirable.
Grain Synthesis
AV1 provides a unique feature in the form of grain synthesis, which has largely been reserved for use in the command line for those who know its benefits. Grain synthesis aims to provide natural film grain to a video without hurting compression efficiency by removing grain from the source & reapplying it at decode time as a filter. As explained in the in-app tooltip, film grain levels are equivalent to ISO noise from a camera. 1 would be ISO 100, 24 would be ISO 2400, continuing up to 64. Because of av1an, we are also able to apply this noise as chroma noise which increases its realism.
Audio
The audio screen provides more sane defaults; these include compression via the highly efficient & open source Opus codec, an option to downmix the output to stereo from a larger number of channels, and a toggle for variable bit rate.
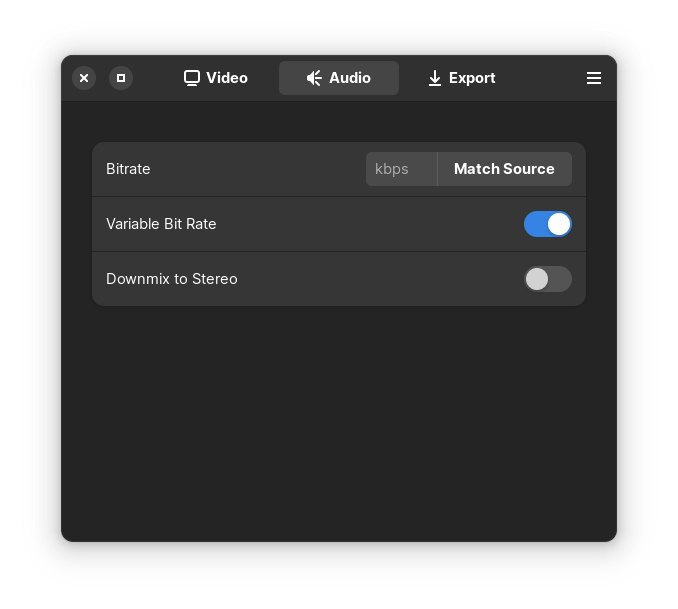
By default, the audio bitrate will be pulled from the source. If this isn't
detected, it will default to 48kbps which is admittedly rather low but
ultimately not something I've heard many complaints about. I think it provides a
reasonable level of quality for more general applications, like screen
recordings or smartphone videos. Downmixing to stereo uses ffmpeg's default
-ac 2 flag which I've found to be decent and reliable despite discarding the
subwoofer channel(s).
Output
The output screen has a file selector with two container options that are clearly explained with a tooltip, and a big blue 'Encode' button that eagerly invites you to start encoding.
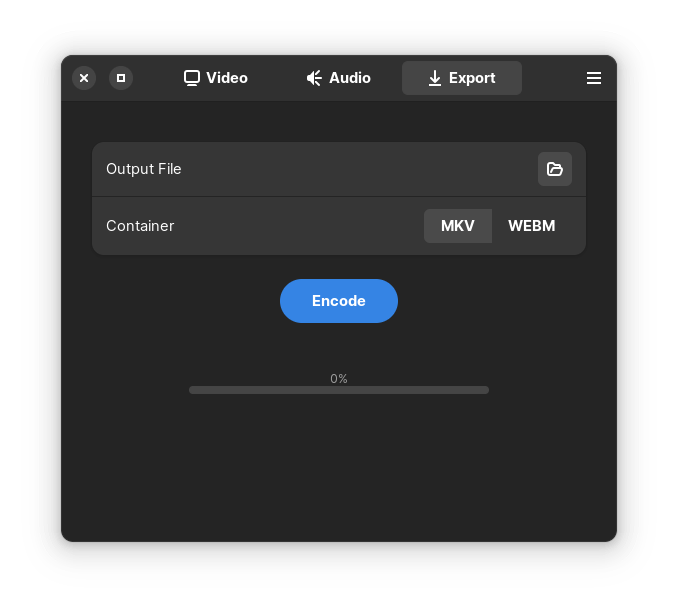
Upon pressing the blue button, the progress bar will indicate to you the status of the encode alongside a percentage.
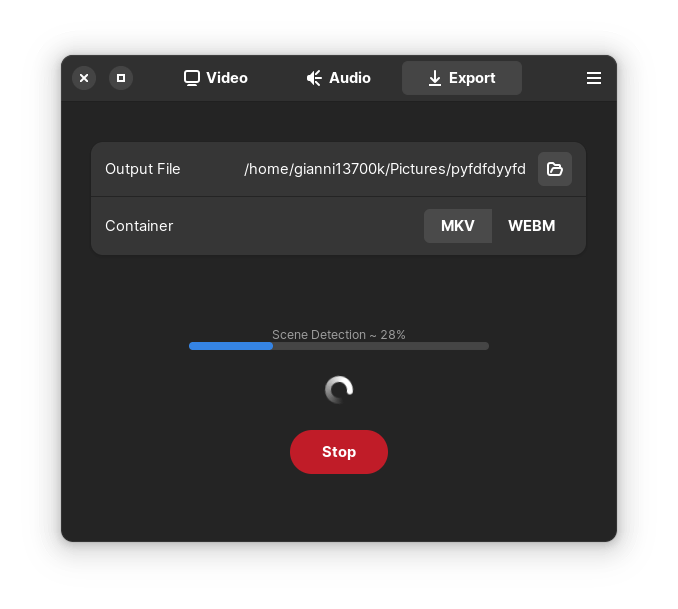
Eventually, you will get a notification when the encode is complete & the progress bar will reflect the status of your encode with a message just in case you have Do Not Disturb on or missed the notification by accident. If the av1an process does not complete successfully or you manually halt your encode with the Stop Encode button, you will be met with a different notification that the status of the progress bar's text will math.
That's great, but I'm on Windows
Well, I'm sorry for you, and you should reconsider your choice of operating system. That being said, there is a great Windows AV1 encoding GUI called nmkoder that you should definitely try out.
You're missing feature X, Y, Z
Right now, I'm going to let this release fester for a bit before diving back into development. I would still love to see your suggestions for improvement over at the github page where you can put in issues for whatever you'd like to see us do in the future.
Regarding hardware encoding:
I did my research. There's a time and a place.
Special Thanks
Many thanks to Nate for walking me through development since I began learning python as my first real language a couple weeks ago, and thanks to the people who are a part of the AV1 community for their passion toward multimedia codecs that keeps our videos crispy, our storage unconstrained, & our CPUs toasty. Particular thanks to Blue & MasterOfZen for their tools that I use in & out of this project and are indispensible to the community.
Enjoy rAV1ator, happy flying! ✈️

